High Sensitive Acceleration Transducer ARS-A High sensitive Acceleration Transducer 10m/s2
ARS-A High sensitive Acceleration Transducer 10m/s2
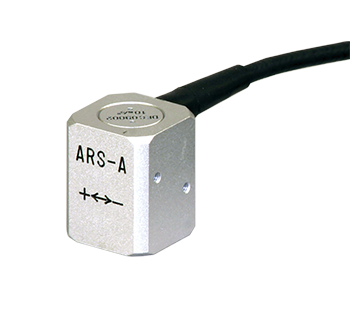
This is a small acceleration transducer suitable for measurement of vibration mode of machines and structures including cable tension of bridges. High sensitivity of 30000 x 10-6 strain for 10 m/s2 makes minute vibration measurement possible.
Protection ratings : IP 61 equivalent
- Features
- Compact
- High sensitive
- Easy to install
-
Specifications
Type Capacity Rated output Non-linearity Temperature ARS-10A 10 m/s2 Approx. 15m V/V(30000 x 10-6 strain) 1%RO -10 to +50 ℃ Output polarity
Measurement moves in the plus direction when acceleration occurs in the acceleration transducer itself toward the “+” mark on the casing.
More Information
Frictional type Axial Strain Transducer
High Sensitive Acceleration Transducer
Frictional type Axial Strain Transducer Frictional type Axial Strain Transducer FGAH-1B-R / FGAH-1B-H
Frictional type Axial Strain Transducer FGAH-1B-R / FGAH-1B-H
Approximately 1000 × 10-6 strain
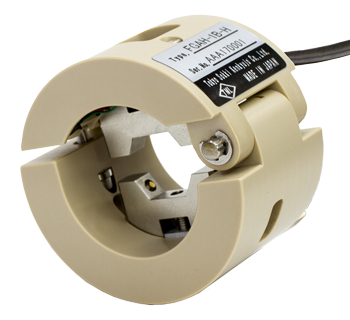
This is a transducer to measure axial strain of tie-rod of a car. It is also suited to measure axial strain of tension rod used in aseismic reinforcement structure or in steel frame structure. Since frictional strain gauges are used in this transducer, installation is completed and it gets ready for measurement by merely pinching the rod with the transducer, without detaching the rod. There is no need of technical skill or complicated works for attaching strain gauges on the rod. It is applicable either to round rod or hexagonal rod by replacing the spacer and fixing bracket.
- Features
- No need to remove an in-place rod; simply clamps on
- Facilitates tension control of rods between sheet piles and architectural structures at civil engineering projects, can be removed and used again
- Applicable rod diameters are ø10 to 25 mm, width across flats 13 to 25 mm
- Compact, lightweight design allowing installation even in narrow spaces
-
Specifications
Type FGAH-1B-R FGAH-1B-H Applicable shaft Round shape
Φ 10.0 to 25.0 mmHexagon shape
Width across flats
13.0 to 25.0 mmCapacity Approx. 1000 x 10-6 strain Rated output Approx. 2600 x 10-6 strain Non-linearity 1%RO Allowable temperature range -30 to +60 ℃(no dew condensation) Frequency response Approx. 6.5 kHz Input/output resistance 1000 Ω ± 3% Sensor mode Full bridge Dimensions Approx. Φ 52 x 35 mm Weight Approx. 55 g(excluding spacers and cable) Protection rating Equivalent to IP51 Recommended exciting voltage 2 V Allowable exciting voltage 5 V Input/output cable Φ 3.2 mm 0.08 mm² 4-core shielded vinyl cable 5 m [Test conditions] Test piece
1. Diameter 10 mm 2. Inner diameter 6.2 mm 3. Material SNCM439 4. Elastic modulus 208,000 N/mm2 (our in-house test result) 5. Poisson’s ratio 0.29 (our in-house test result) 6. Surface roughness Ra0.8 7. Hardness HRC38 * : This transducer may not be applicable depending on the material, surface roughness and/or surface treatment of the rod.
More Information
Network Module Counter Module NSW-01C
Network Module
Counter Module NSW-01C
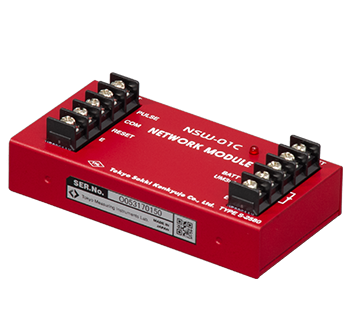
This is a conventional module dedicated to pulse counting of non-voltage contact or open collector input. It is used for measuring rain gauge, flow meter, frequency of traffics and machine operation, and so on.
-
Specifications
Type NSW-01C Number of measurement point 1 point Measurement time 200 ms/point (including transfer time) Programmable item Channel number (000-999) Input signal Contact / Open collector signal with square wave Responding pulse width 0.01 sec or more Measuring range 32000 counts Measurement data Accumulated counts Reset At power on / Full count / External reset Back up External (optional battery case BA-500A) Dimensions 52(W) x 20(H) x 102(D) mm Weight Approx. 250 g
Strain Calibrators CBA-131A
Strain Calibrator CBA-131A
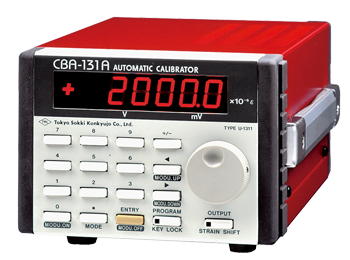
The CBA-131A is a full bridge strain calibrator for static and dynamic strainmeters. The input bridge resistance can be switched between 120Ω and 350Ω, and the bridge excitation is available in both constant voltage and constant current.
- Features
- Computer control possible (via RS-232C)
- Wide calibration range (±1000000×10-6 strain)
- High resolution (1/100000, 0.1×10⁻⁶ strain at the maximum)
- Excellent stability
- Usable as a standard power source of ±20V (0.1mV resolution)
(Also usable as a constant current output) - 120Ω, 350Ω switchable
-
Specifications
Type CBA-131A Bridge resistance 120Ω, 350Ω switchable Bridge configuration Full bridge Bridge excitation 10V max. Dimensions 140(W)x100(H)x220(D)mm Weight 2 kg Power source AC90 to 110V (50/60Hz)
15VA max.
Strain Calibrators CBM-122A/352A/123A/353A
Strain Calibrator CBM-122A/352A/123A/353A
CBM-122A/CBM-352A
These are highly stable strain calibrators used for operation check and sensitivity calibration of static and dynamic strainmeters (bridge excitation frequency of 20 kHz or lower). Bridge resistances are 120 Ω for CBM-122A, and 350 Ω for CBM-352A, and calibration by full bridge method is possible.
CBM-123A/CBM-353A
These are highly stable strain calibrators used for operation check and sensitivity calibration of static strainmeters and switchboxes. Bridge resistances are 120 Ω for CBM-123A, and 350 Ω for CBM-353A, and calibration by quarter bridge, quarter bridge 3-wire, half bridge, full bridge methods is possible.
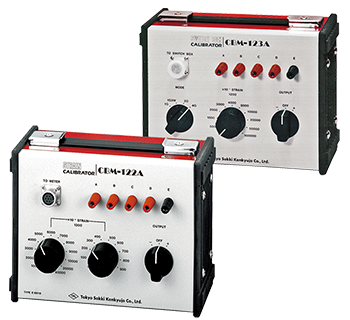
- Features
- Wide calibration range
CBM-122A/CBM-352A (±100 to ±40000x10-6 strain)
CBM-123A/CBM-353A (±500 to ±100000x10-6 strain)
- Wide calibration range
-
Specifications
Type CBM-122A CBM-352A CBM-123A CBM-353A Bridge resistance 120Ω 350Ω 120Ω 350Ω Bridge configuration Full bridge Quarter, Quarter 3-wire, Half, and Full bridge Dimensions 210(W)x84(H)x158(D)mm Weight Approx. 1.4 kg Approx. 1.6 kg
Strain Checker CB-2R
Strain Checker CB-2R
This is a highly stable strain checker suited to sensitivity calibration and zero shift monitoring of strainmeters. Bridge resistance value is 120 Ω or 350 Ω, and switch operation produces two differing calibration values.
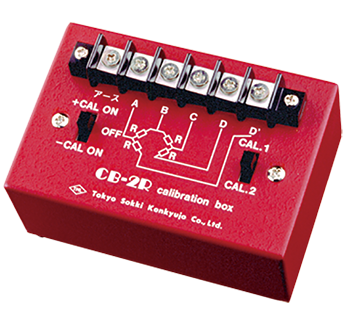
- Features
- Bridge resistance of 120Ω or 350Ω (to be selected when ordering)
- Two calibration values (to be selected from the specified values when ordering)
- Switching terminal connections allows calibration by quarter bridge, quarter bridge 3-wire, half bridge, and full bridge methods.
-
Specifications
Type CB-2R Bridge resistance 120Ω or 350Ω(to be specified when ordering) Bridge configuration Quarter, Quarter 3-wire, Half, and Full bridge Dimensions 100(W)×45(H)×70(D) mm Weight Approx. 500 g


