Relay Cable
Relay Cable
This relay cable is specifically designed for use with chain gauges (CCFXX, CCFYX). It internally converts 11-line wiring to 30-line wiring, allowing for easy connection to measuring instruments via an NDIS plug.
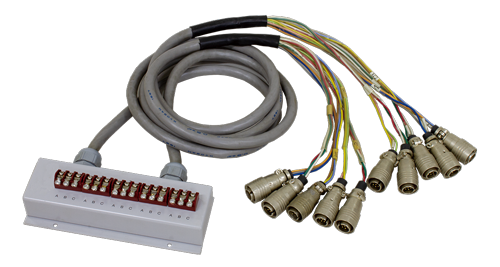
Chain Strain Gauges measurement method
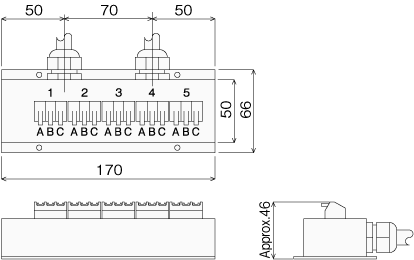
This relay cable is specifically designed for use with chain gauges (CCFXX, CCFYX). It internally converts 11-line wiring to 30-line wiring, allowing for easy connection to measuring instruments via an NDIS plug.
As with the GLJ-5A, this product is reusable and available in custom lengths upon request. (Made to order)
| Type | Length of cable standard (m) |
No. of connection |
Operational temperature (℃) |
Dimension WidexDepthxHeight (mm) |
Core/diameter (Cross section area) |
|---|---|---|---|---|---|
| CGLJ-10A(3) | 3 | 10 | 0 to +80 | 170x66xapprox.46 | Φ11.1mm 20/0.18 (0.5mm2) |
Connecting Terminals
Connecting Terminals
Connecting terminals
TML Connecting Terminals provide convenient junction points to connect strain gauges to instrumentation leadwires.
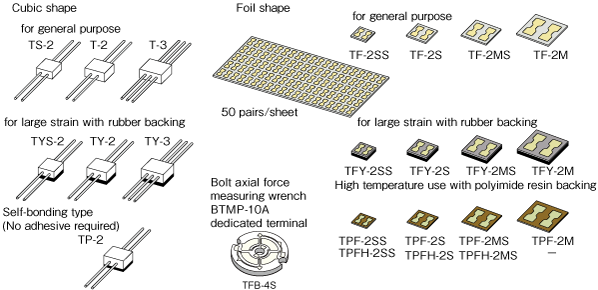
T series is made of a cubic plastic and two wires of approximately 0.8mm diameter are fixed to the cube. TY is laminated with rubber sheet and suitable for large strain measurement. TP-2 is a self-bonding terminal with two wires. TF is made of a 0.03mm thick copper foil and a glass-epoxy insulation base of approx. 0.15mm thick. TFY is laminated with rubber sheet approx. 0.8mm thick over the back side of TF series terminals.
-
Type list
Type Dimensions
(mm)Operating
temperature
(℃)Use Quantity T-2 10x10x5 -20 to +90 Cubic shape for general purpose 100pieces/box T-3
(3-wire system use)10x10x5 -20 to +90 Cubic shape for general purpose 100pieces/box TS-2 7.5x7.5x5 -20 to +90 Cubic shape small 100pieces/box TYS-2 7.5x7.5x7 -20 to +90 Cubic shape for large strain with rubber backing 100pieces/box TY-2 10x10x7 -20 to +90 Cubic shape for large strain with rubber backing 80pieces/box TY-3
(3-wire system use)10x10x7 -20 to +90 Cubic shape for large strain with rubber backing 880pieces/box TP-2 10x10x6 -20 to +60 Cubic shape self-bonding type 100pieces/box TF-2SS 4.6x3.8x0.2 -196 to +180 Foil shape for general purpose 50pairs/sheet TF-2S 6x5.3x0.2 -196 to +180 Foil shape for general purpose 50pairs/sheet TF-2MS 8×8x7.2x0.2 -196 to +180 Foil shape for general purpose 50pairs/sheet TF-2M 10x9.2x0.2 -196 to +180 Foil shape for general purpose 50pairs/sheet TFY-2SS 4.6x3.8x0.8 -20 to +120 Foil shape for large strain with rubber backing 50pairs/sheet TFY-2S 6x5.3x0.8 -20 to +120 Foil shape for large strain with rubber backing 50pairs/sheet TFY-2MS 8x7.2x0.8 -20 to +120 Foil shape for large strain with rubber backing 50pairs/sheet TFY-2M 10x9.2x0.8 -20 to +120 Foil shape for large strain with rubber backing 50pairs/sheet TPF-2SS 4.6x3.8x0.2 -196 to +200 Foil shape High temperature use 50pairs/sheet TPF-2S 6x5.3x0.2 -196 to +200 Foil shape High temperature use 50pairs/sheet TPF-2MS 8x7.2x0.2 -196 to +200 Foil shape High temperature use 50pairs/sheet TPF-2M 10x9.2x0.2 -196 to +200 Foil shape High temperature use 50pairs/sheet TPFH-2SS 4.6x3.8x0.1 -269 to +350 Foil shape High temperature use 50pairs/sheet TPFH-2S 6x5.3x0.1 -269 to +350 Foil shape High temperature use 50pairs/sheet TPFH-2MS 8x7.2x0.1 -269 to +350 Foil shape High temperature use 50pairs/sheet TFB-4S Φ12×1 -0 to +60 For bolt axial force measurement wrench 10 pcs./bag
More Information
Platinum RTD/Thermocouples
Settlement Transducer Common-use Accessories
Platinum RTD/Thermocouples
Platinum RTD/Thermocouples
These platinum RTD (resistance temperature detector) and thermocouples are mounted on a specimen and connected to a data logger (TDS-540, TDS-630 etc.) to measure temperature.
PLATINUM RTD (Pt100)
The platinum RTD is mount ed on a specimen and connect to a data logger to measure temperature. Easy measurement of temperature by bonding to a specimen with strain gauge adhesive. Units equipped with lead wire are also available upon request.
| Type | Rated current | Base size (mm) |
Resistance in (Ω) |
Operational temperature (℃) |
|---|---|---|---|---|
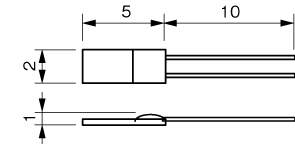
| CRZ-2005 | 1mA or less | 5.0x2.0x1.1 | 100 (at 0 ℃) | -40 to +400 ℃ |
THERMOCOUPLE
A thermocouple configures the closed circuit in which a small electric current flow in the circuit composed of a pair of dissimilar conductors, and measures temperature using thermoelectric effect produced at both ends of conductors in different temperatures.
| Type | Thermo- couple code |
Core diameter (mm) |
Outer diameter |
Sheath materials |
Outer sheath |
Heat- resistive temperature |
Length of one roll |
Remarks |
|---|---|---|---|---|---|---|---|---|
| T-G-0.32 | T | 0.32 | 2.1x3.2 | Heat-resistive | Brown | 100 ℃ approx. |
100m | |
| T-G-0.65 | T | 0.65 | 2.6x4.0 | Heat-resistive | Brown | 100 ℃ approx. |
||
| T-6F-0.32 | T | 0.32 | 1.0x1.6 | Fluoro-ethylene propylene |
Brown | 200 ℃ approx. |
||
| T-6F-0.65 | T | 0.65 | 1.5x2.5 | Fluoro-ethylene propylene |
Brown | 200 ℃ approx. |
||
| T-GS-0.65 | T | 0.65 | Φ7.2 | Heat-resistive vinyl (shielded) |
Brown | 100 ℃ approx. |
Shielded | |
| K-H-0.32 | K | 0.32 | 1.4x2.3 | Glass fiber | Blue |
250 ℃ |
||
| K-H-0.65 | K | 0.65 | 2.0x3.4 | Glass fiber | Blue | 250 ℃ approx. |
More Information
Small FWD System FWD-Light
FWD-Light® Product Configuration
Product Configuration
| Product Name | Compact set | Standard set | Notes: Standard accessories |
|---|---|---|---|
| Main Body KFD-100A Built-in sensor acceleration transducer load cell |
 |
 |
weight (5kg):KFDF-11-05 Loading plate (ø100 x 15(thick)mm) :KFDF-31-100 5m cable |
| Exclusive Indicator TC-351F Of view (21 digits × 8 lines) RS-232C interface Card slot |
 |
 |
AC Power Battery Pack |
| Mobile Storage Aluminum Carrying Case KFDF-21-1 |
- |  |
Storage: body, only indicator options (external displacement sensor, the printer only) |
| 64MB Compact flash memory card |
- |  |
|
| Memory card adapter | - |  |
Small FWD main body KFD-100A
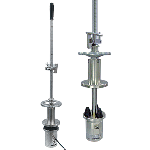
KFD-100A is a small body falling from a heavy weight and loading of the accelerometer and built-FWD load meter free-fall will be the weight of the body weight, total amount of load and displacement values when the impact load, using an accelerometer measures. Displacement of the accelerometer measurements are derived by integrating two times.
Degree of protection IP 42 equivalent
Specifications
| Dimensions of loading plate | φ100 x 15(thick)mm |
|---|---|
| Mass of weight | 5kg |
| Falling height | 50 to 530mm |
| Falling method of weight | Lever (with stopper) |
| Maximum load | 20kN |
| Miaximum displacement | 2.500mm |
| Strain gauge based sensor | |
| Load Cell | 1 point, 20kN |
| Acceleration transducer | 1 point, 500m/s2 |
| Data acquisition | |
| No. of measuring points | 2 points (load nad acceleration) |
| Measuring accuracy | ±(0.1%rdg+2digit) (at23±5℃) |
| Data memory | 800 data/point |
| Sampling speed | 50μs |
| Trigger function | By data (load value) Trigger method Data trigger recording |
| Interface | Exclusive 2-wire serial transfer |
| No. of external displacement sensor | 4 points at maximum |
| Power source | Supplied by TC-351F |
| Environment | -20 to +60°C, less than 85%RH (no condensation) |
| Height | Approx. 1100mm |
| Weight | Approx. 15kg. (including 5kg weight) |
External Displacement Sensor KFDS-1B

FWD-Light for the External Displacement Sensors up to 4 expansion units can be connected. 5m cable included
Degree of protection IP 42 equivalent
Specifications
| Maximum displacement | 0 to 1.000mm (accelerometer sensor) |
|---|---|
| Dimensions | φ79 x 125(H)mm (excluding protrusions) |
| Mass | Approx. 1.5kg |
TC-351F only indicator
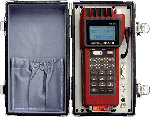
TC-351F is only a small indicator FWD measurement results via display system with LCD display to record the flash memory card indicator. Measurement data recorded in computer memory card can be read and inserted into a PC card slot. In addition, optional software measurement process can be measured in the TC-7100 using the online. Online measurements can also be incorporated into your PC as well as raw waveform data analysis.
Specifications
| Indicator | 128 x 64 dots liquid crystal display |
|---|---|
| Content View | |
| Display Monitor | Load, acceleration sensor * external acceleration, time |
| Analysis show | Maximum load value, the maximum displacement displacement displacement sensor * maximum external coefficient of subgrade reaction (KTML), soil modulus (ETML) Last-minute analysis and three times, including four minutes show times |
| View sample | |
|
|
|
| Recorded data display | Namba consecutive record data file specified in the memory card data along with records of three times |
| File Management | File management record data file specified No initialization data erase memory card recording |
| Real-time clock | |
| Settings | Year, month, day, hour, minute, second |
| Accuracy | ±2sec/day (at 23±5℃) |
| Memory Card recording analysis | |
| Standard Card | PC Card Standard compliant (TypeII) |
| Card type | Compact flash memory card (with adapter card) or ATA flash memory |
| Card capacity | 8 to 128 Mbyte |
| Recording Format | CSV file |
| Measurement processing software interface options (TC-7100) when using | |
| Standards | RS-232C |
| Features | Receiving control commands, Sent to the printer only print out the measurement data |
| Power | |
| Battery | Ni-MH battery pack |
| Hours continuous use | Approx. 32h, or approx. 1000 times measured(at 23±5℃) Standard configuration in a state of full charge (without options) at 30 times / When did the measurement of time |
| Vibration resistance | 30m/s2 (at 50Hz 0.6mmp-p) |
| Waterproof | IP-54 (installed state Connector cap) |
| Operating temperature and humidity range | -10 to +50℃ 85%RH or less (noncondensing) |
| Dimensions | Approx. 150(W) x 120(H) x 265(D)mm (excluding protrusions) |
| Mass | Approx. 3kg |
Options
| Product Name | Type | Product photo | Notes |
|---|---|---|---|
| External Displacement Sensor | KFDS-1B | 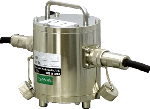 |
5m cable included |
| Added weight drop(10kg) | KFDF-11-10 | 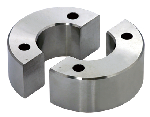 |
|
| Added weight drop(15kg) | KFDF-11-15 | ||
| Loading plate(φ150mm) | KFDF-31-150 | 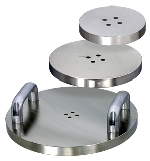 |
φ150×t15mm |
| Loading plate(φ200mm) | KFDF-31-200 | φ200×t15mm | |
| Loading plate(φ300mm) | KFDF-31-300 | φ300×t22mm | |
| Simple calibration device | KFDF-61 |  |
Simple calibration equipment for measuring data to confirm this at the scene |
| Rubber buffer | KFDF-51 | 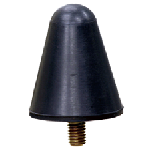 |
|
| Mobile Storage Aluminum Case | KFDF-21-2 | 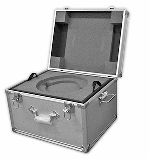 |
Weight for weight with storage options / external displacement |
| Careers | KFDF-41 | 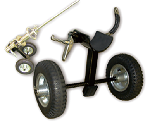 |
FWD-Light fixtures only move |
| Software measurement process | TC-7100 | 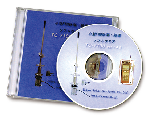 |
For Windows |
| RS-232C cable | CR-5360 |  |
|
| 128MB flash memory card capacity | Uses card adapter | ||
| Printer only | DPU-S245 | 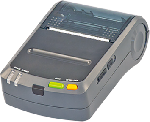 |
|
| Printer cable | CR-4530 | ||
| Printer paper | TP-S245L-1 |
Small FWD System FWD-Light
Braking Pedal Force Transducer
Braking Pedal Force Transducer MLA-NA
This is a load cell to measure the brake pedal force. It can easily be attached without modifying the pedal.
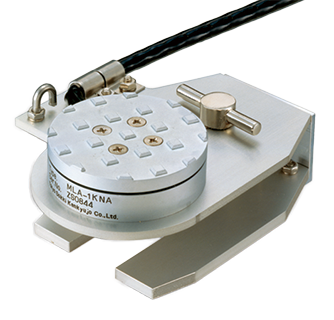
- Features
- Easy installation
- Constructed thin and light
- Little measurement error caused by the position to step on the pedal
- Comes with hook for displacement transducer wire
-
Specifications
Type Capacity Rated output Nonlinearity Allowable temperature range MLA-1KNA 1kN 1mV/V(2000×10-6 strain)±10% 0.3%RO -10 to +60℃
More Information

 marked when using the optional external sensor
